1Empty
2Empty
3Empty
4Empty
5Empty
6Empty
7Empty
8Empty
9Empty
10Empty
11Empty
12Empty
13Empty
14Empty
15Empty
16Empty
17Empty
18Empty
19Empty
20Empty
21Empty
22Empty
23Empty
24Empty
25Empty
Showing 25 of 97 items. Scroll for more
Tabletop random spin wheel with colored slices on a stand
Spin it for realTabletop random spin wheels
Shop spin wheels
As an Amazon Associate we earn from qualifying purchases.
Public
42lifetime spins
7m 2stotal spin time

TierMakerView Tier ListCreated byTierMakerVerified

About this Skylanders SA & Giants Figures by Path wheel spinner

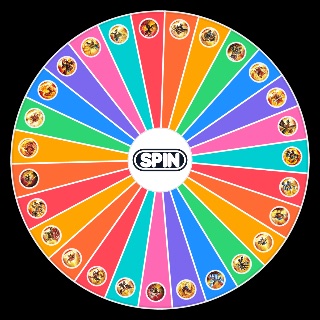
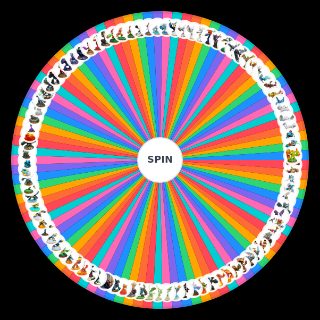
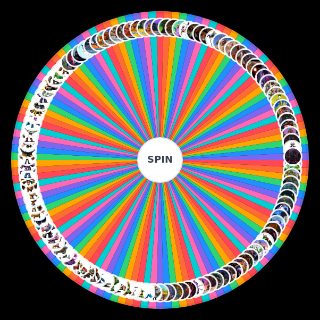
A free Skylanders SA & Giants Figures by Path wheel spinner with 97 options. Tap spin for a random pick every time — no sign-up needed.

With 97 options loaded, you get a random result on every spin. It's part of our Skylanders spin wheels. Tap spin as many times as you like — reshuffle and go again.

All 97 options on the wheel spinner

  • Powerbash10png — Skylanders SA & Giants Figures by Path option 1
  • Powerbash9png — Skylanders SA & Giants Figures by Path option 2
  • Powerboomer12png — Skylanders SA & Giants Figures by Path option 3
  • Powerboomer8png — Skylanders SA & Giants Figures by Path option 4
  • Powerbouncer10jpg — Skylanders SA & Giants Figures by Path option 5
  • Powerbouncer7jpg — Skylanders SA & Giants Figures by Path option 6
  • Powercamo12png — Skylanders SA & Giants Figures by Path option 7
  • Powercamo9png — Skylanders SA & Giants Figures by Path option 8
  • Powerchill11jpg — Skylanders SA & Giants Figures by Path option 9
  • Powerchill9jpg — Skylanders SA & Giants Figures by Path option 10
  • Powerchop11png — Skylanders SA & Giants Figures by Path option 11
  • Powerchop9png — Skylanders SA & Giants Figures by Path option 12
  • Powercrusher12jpg — Skylanders SA & Giants Figures by Path option 13
  • Powercrusher8jpg — Skylanders SA & Giants Figures by Path option 14
  • Powercynder11png — Skylanders SA & Giants Figures by Path option 15
  • Powercynder7png — Skylanders SA & Giants Figures by Path option 16
  • Powerdino Rang11png — Skylanders SA & Giants Figures by Path option 17
  • Powerdino Rang9png — Skylanders SA & Giants Figures by Path option 18
  • Powerdog12jpg — Skylanders SA & Giants Figures by Path option 19
  • Powerdog7jpg — Skylanders SA & Giants Figures by Path option 20
  • Powerdouble10png — Skylanders SA & Giants Figures by Path option 21
  • Powerdouble9png — Skylanders SA & Giants Figures by Path option 22
  • Powerdrill10png — Skylanders SA & Giants Figures by Path option 23
  • Powerdrill8png — Skylanders SA & Giants Figures by Path option 24
  • Powerdrobot11png — Skylanders SA & Giants Figures by Path option 25
  • Powerdrobot9png — Skylanders SA & Giants Figures by Path option 26
  • Powereruptor11png — Skylanders SA & Giants Figures by Path option 27
  • Powereruptor7png — Skylanders SA & Giants Figures by Path option 28
  • Powereye Brawl11jpg — Skylanders SA & Giants Figures by Path option 29
  • Powereye Brawl7jpg — Skylanders SA & Giants Figures by Path option 30
  • Powerflameslinger12png — Skylanders SA & Giants Figures by Path option 31
  • Powerflameslinger9png — Skylanders SA & Giants Figures by Path option 32
  • Powerflashwing12jpg — Skylanders SA & Giants Figures by Path option 33
  • Powerflashwing7jpg — Skylanders SA & Giants Figures by Path option 34
  • Powerfright12jpg — Skylanders SA & Giants Figures by Path option 35
  • Powerfright9jpg — Skylanders SA & Giants Figures by Path option 36
  • Powerghost10png — Skylanders SA & Giants Figures by Path option 37
  • Powerghost8png — Skylanders SA & Giants Figures by Path option 38
  • Powergill10png — Skylanders SA & Giants Figures by Path option 39
  • Powergill7png — Skylanders SA & Giants Figures by Path option 40
  • Powerhex11png — Skylanders SA & Giants Figures by Path option 41
  • Powerhex8png — Skylanders SA & Giants Figures by Path option 42
  • Powerhot11jpg — Skylanders SA & Giants Figures by Path option 43
  • Powerhot7jpg — Skylanders SA & Giants Figures by Path option 44
  • Powerignitor12png — Skylanders SA & Giants Figures by Path option 45
  • Powerignitor9png — Skylanders SA & Giants Figures by Path option 46
  • Powerjet Vac12jpg — Skylanders SA & Giants Figures by Path option 47
  • Powerjet Vac7jpg — Skylanders SA & Giants Figures by Path option 48
  • Powerlightning12png — Skylanders SA & Giants Figures by Path option 49
  • Powerlightning9png — Skylanders SA & Giants Figures by Path option 50
  • Powerninjini10jpg — Skylanders SA & Giants Figures by Path option 51
  • Powerninjini9jpg — Skylanders SA & Giants Figures by Path option 52
  • Powerpop12jpg — Skylanders SA & Giants Figures by Path option 53
  • Powerpop9jpg — Skylanders SA & Giants Figures by Path option 54
  • Powerprism12png — Skylanders SA & Giants Figures by Path option 55
  • Powerprism9png — Skylanders SA & Giants Figures by Path option 56
  • Powershroomboom12jpg — Skylanders SA & Giants Figures by Path option 57
  • Powershroomboom8jpg — Skylanders SA & Giants Figures by Path option 58
  • Powerslam12png — Skylanders SA & Giants Figures by Path option 59
  • Powerslam8png — Skylanders SA & Giants Figures by Path option 60
  • Powersonic12png — Skylanders SA & Giants Figures by Path option 61
  • Powersonic8png — Skylanders SA & Giants Figures by Path option 62
  • Powersprocket11jpg — Skylanders SA & Giants Figures by Path option 63
  • Powersprocket9jpg — Skylanders SA & Giants Figures by Path option 64
  • Powerspyro12png — Skylanders SA & Giants Figures by Path option 65
  • Powerspyro7png — Skylanders SA & Giants Figures by Path option 66
  • Powerstealth10png — Skylanders SA & Giants Figures by Path option 67
  • Powerstealth8png — Skylanders SA & Giants Figures by Path option 68
  • Powerstump12png — Skylanders SA & Giants Figures by Path option 69
  • Powerstump7png — Skylanders SA & Giants Figures by Path option 70
  • Powersunburn11png — Skylanders SA & Giants Figures by Path option 71
  • Powersunburn9png — Skylanders SA & Giants Figures by Path option 72
  • Powerswarm10jpg — Skylanders SA & Giants Figures by Path option 73
  • Powerswarm8jpg — Skylanders SA & Giants Figures by Path option 74
  • Powerterrafin11png — Skylanders SA & Giants Figures by Path option 75
  • Powerterrafin7png — Skylanders SA & Giants Figures by Path option 76
  • Powerthumpback12jpg — Skylanders SA & Giants Figures by Path option 77
  • Powerthumpback9jpg — Skylanders SA & Giants Figures by Path option 78
  • Powertree10jpg — Skylanders SA & Giants Figures by Path option 79
  • Powertree7jpg — Skylanders SA & Giants Figures by Path option 80
  • Powertrigger12png — Skylanders SA & Giants Figures by Path option 81
  • Powertrigger9png — Skylanders SA & Giants Figures by Path option 82
  • Powervoodood10png — Skylanders SA & Giants Figures by Path option 83
  • Powervoodood7png — Skylanders SA & Giants Figures by Path option 84
  • Powerwarnado12png — Skylanders SA & Giants Figures by Path option 85
  • Powerwarnado8png — Skylanders SA & Giants Figures by Path option 86
  • Powerwham Shell10png — Skylanders SA & Giants Figures by Path option 87
  • Powerwham Shell9png — Skylanders SA & Giants Figures by Path option 88
  • Powerwhirlwind11png — Skylanders SA & Giants Figures by Path option 89
  • Powerwhirlwind7png — Skylanders SA & Giants Figures by Path option 90
  • Powerwrecking11png — Skylanders SA & Giants Figures by Path option 91
  • Powerwrecking7png — Skylanders SA & Giants Figures by Path option 92
  • Powerzap12png — Skylanders SA & Giants Figures by Path option 93
  • Powerzap7png — Skylanders SA & Giants Figures by Path option 94
  • Powerzook11png — Skylanders SA & Giants Figures by Path option 95
  • Powerzook8png — Skylanders SA & Giants Figures by Path option 96
  • Zz1655218191bxfl71655221095png — Skylanders SA & Giants Figures by Path option 97

More in Skylanders